(continued from Add Another Price Code to an Existing Date Range)
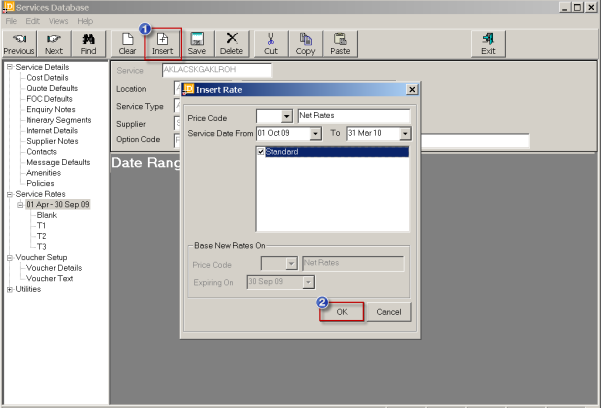
Screen Shot 54: Insert New Date Range

Highlight the existing date range/price code which the new date range follows and then click the ‘Insert’ button  . Tourplan will display the ‘Insert Rate’ dialogue box which has the following fields/choices:
Price Code (Dropdown)
Select the price code being inserted from the drop down.
Service Date From (Date)
By default, Tourplan will display the next date after the existing expiry date. If the new date range does start on this date accept it. If the new date range does not start on the next day, overwrite the default date with the start date required.
Service Date To (Date)
Enter the new expiry date.
Copy Stays (Checkbox)
All or specific existing stay types can be copied. If ‘All Stays’ is unchecked, check those that specifically need to be copied.
Base New Rates on (Dropdowns)
Enter a price code/expiry date for the new price code to be based on.
OK
Click OK on the Insert Rate dialogue  to copy the currently highlighted date range for the Price Code nominated.
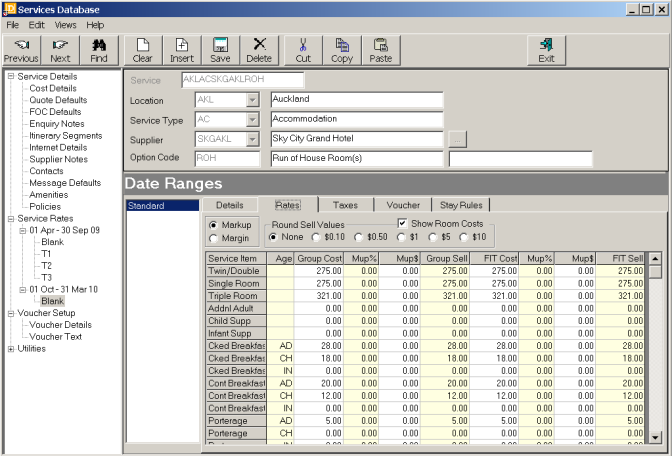
Screen Shot 55: Additional Date Range Added

The newly copied rates can now be modified via the Option Rates tab.
Additional rates for different Price Codes (if applicable) for the new date range can be created by following the same procedure.
(continued in Splitting an Existing Date Range)